Configure Google Cloud Private Service Connect
To keep your network traffic private and minimize its attack surface, configure Private Service Connect to establish a private connection between ValidMind and your company network.
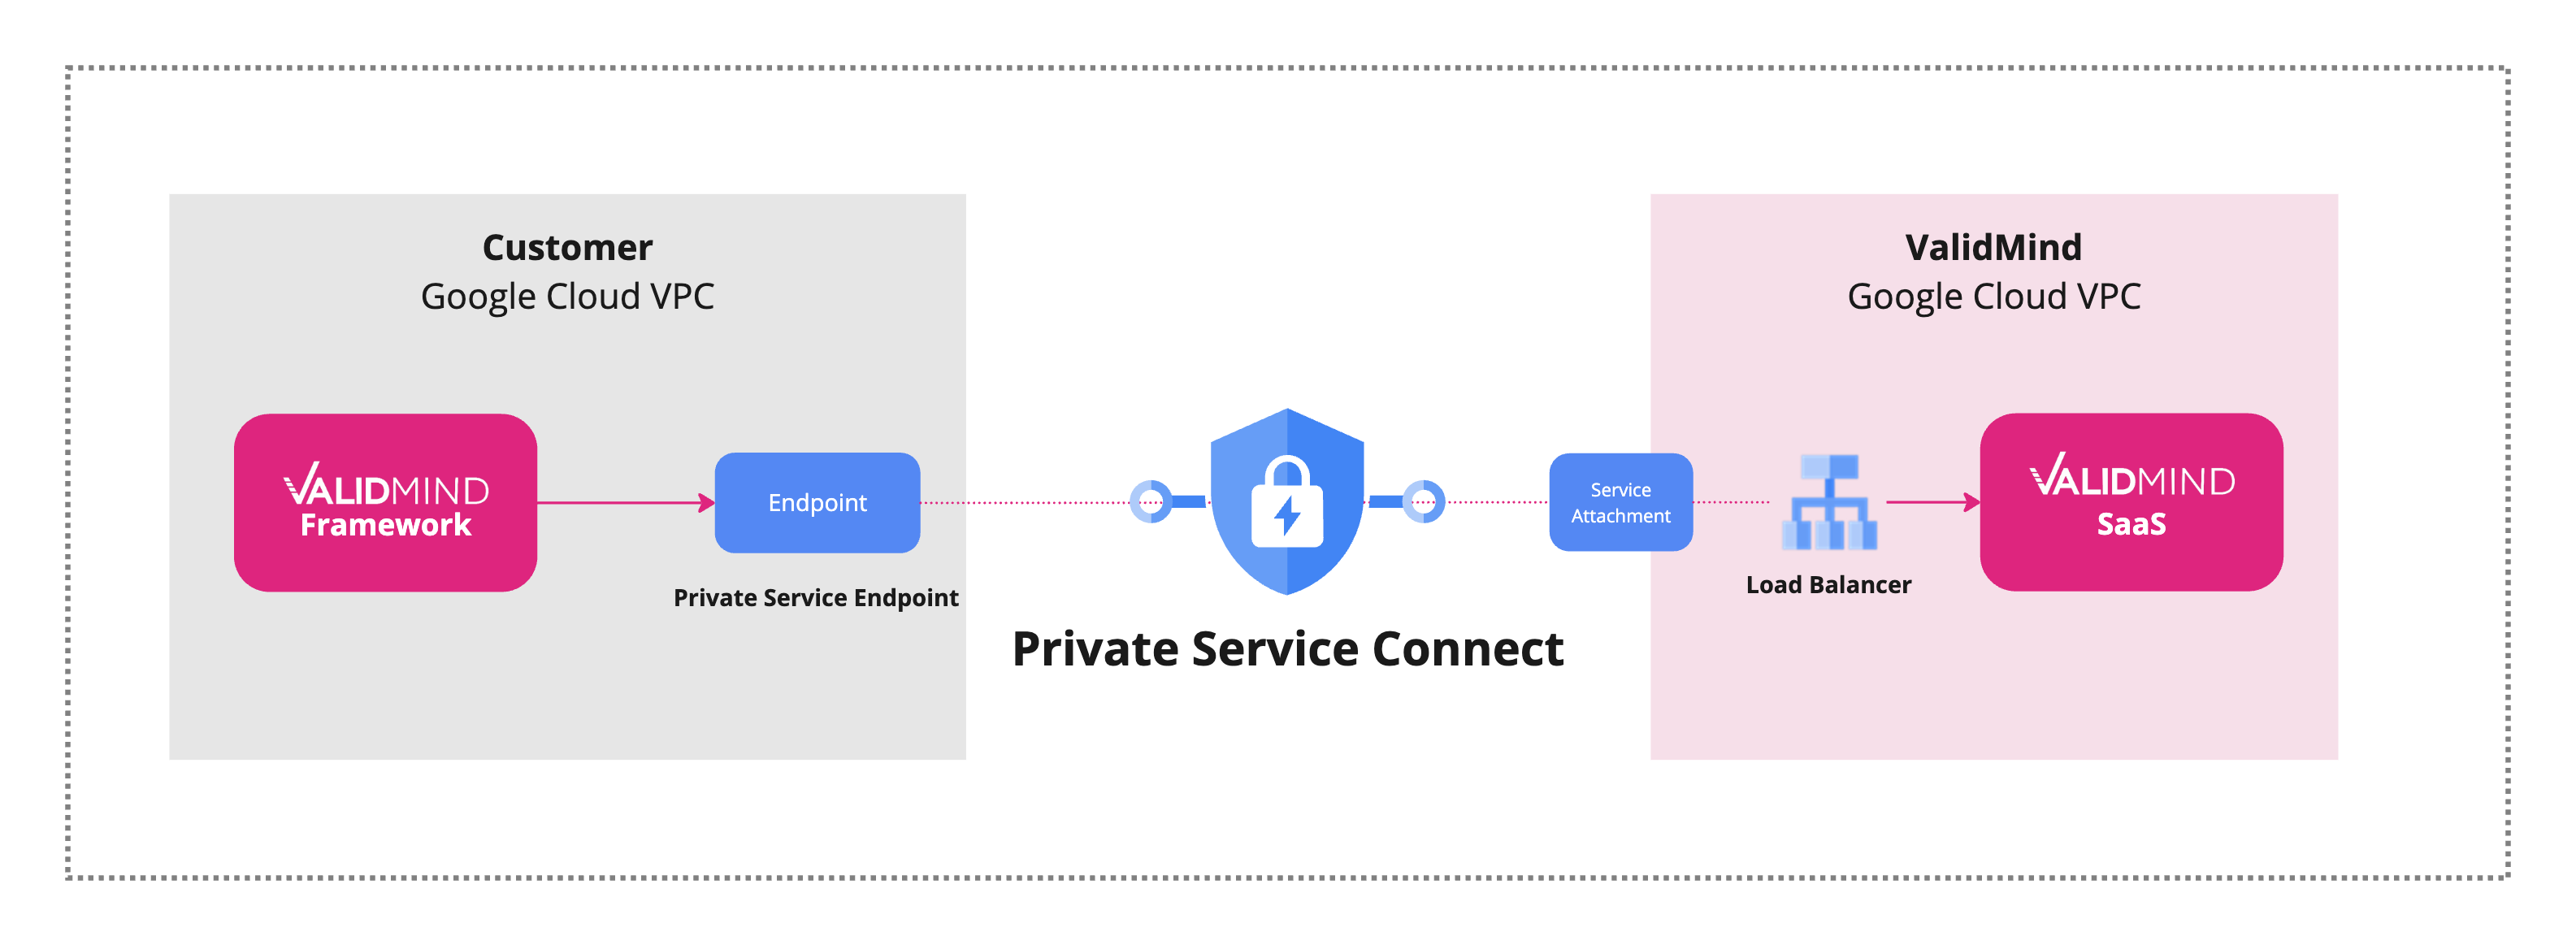
Private Service Connect is a networking service that allows secure and private communication between Google Virtual Private Cloud (VPC) resources and services hosted in other VPCs or Google partner services, such as ValidMind. By creating private endpoints within your VPC, Private Service Connect allows you to connect to services over the Google network without needing to expose your network traffic to the public internet.
To learn more about Private Service Connect, check the official Google documentation.1
1 Google: Private Service Connect
Prerequisites
You must have access to the Google Cloud Console for your company and the necessary expertise to set up, configure, and maintain Google Cloud services.
These steps assume that you already have established connectivity between your own company network and Google VPC and know which company VPC you want to connect to.
VPC service information
| Name | Provider | Region | Service name | Private DNS name |
|---|---|---|---|---|
| US3 | GCP | us-west1 |
Email support@validmind.com | Email support@validmind.com |
Configure your Google Cloud Platform project
Enable the APIs for cloud DNS and networking to get ready for the next steps:
Log into the Google Cloud Console.
From the Select a project drop-down at the top of the console, select the project where you want to enable the Google APIs.
In the navigation menu on the left, click APIs & Services and then Library.
In the API Library, search for “Cloud DNS API” and click the result to open the API page.
On the API page for Cloud DNS, click Enable to activate the API for your project.
Repeat these steps for the Networking API:
- Click Library in the left navigation to return to the API Library.
- Search for “Google Compute Engine API” which includes networking services.
- Click on the search result and click Enable to activate the API.
After these steps, both the Cloud DNS and the Google Compute Engine API should be enabled for your project, allowing you to manage DNS configurations and networking resources.
Request access from ValidMind
Contact ValidMind at support@validmind.ai to get your new VPC endpoint connection request accepted. Include the following information:
- The project name
- The project ID
Prepare your network for connection
Create a private subnet in a supported GCP region that can be used to expose ValidMind services:
In Google Cloud Console, create the subnet:
- On the VPC networks page, click Create VPC network.
- Name your network.
- Configure the IP address range to ensure it includes at least a
/28of usable private IP address space. - Click Create.
Optional: Enable Private Google Access to provide access to Google APIs and services.2
Provision two IP addresses in this subnet for later use:
- On the VPC networks page, select your subnet.
- Note the available IP address range.
- Reserve two IP addresses within this range for future use.
2 Google: Private Google Access
Create an endpoint to connect to ValidMind
Create a Private Service Connect endpoint for accessing ValidMind services securely and privately, with service discovery managed via Google Cloud’s Service Directory.
Steps
In Google Cloud Console, open Network services and click Private Service Connect.
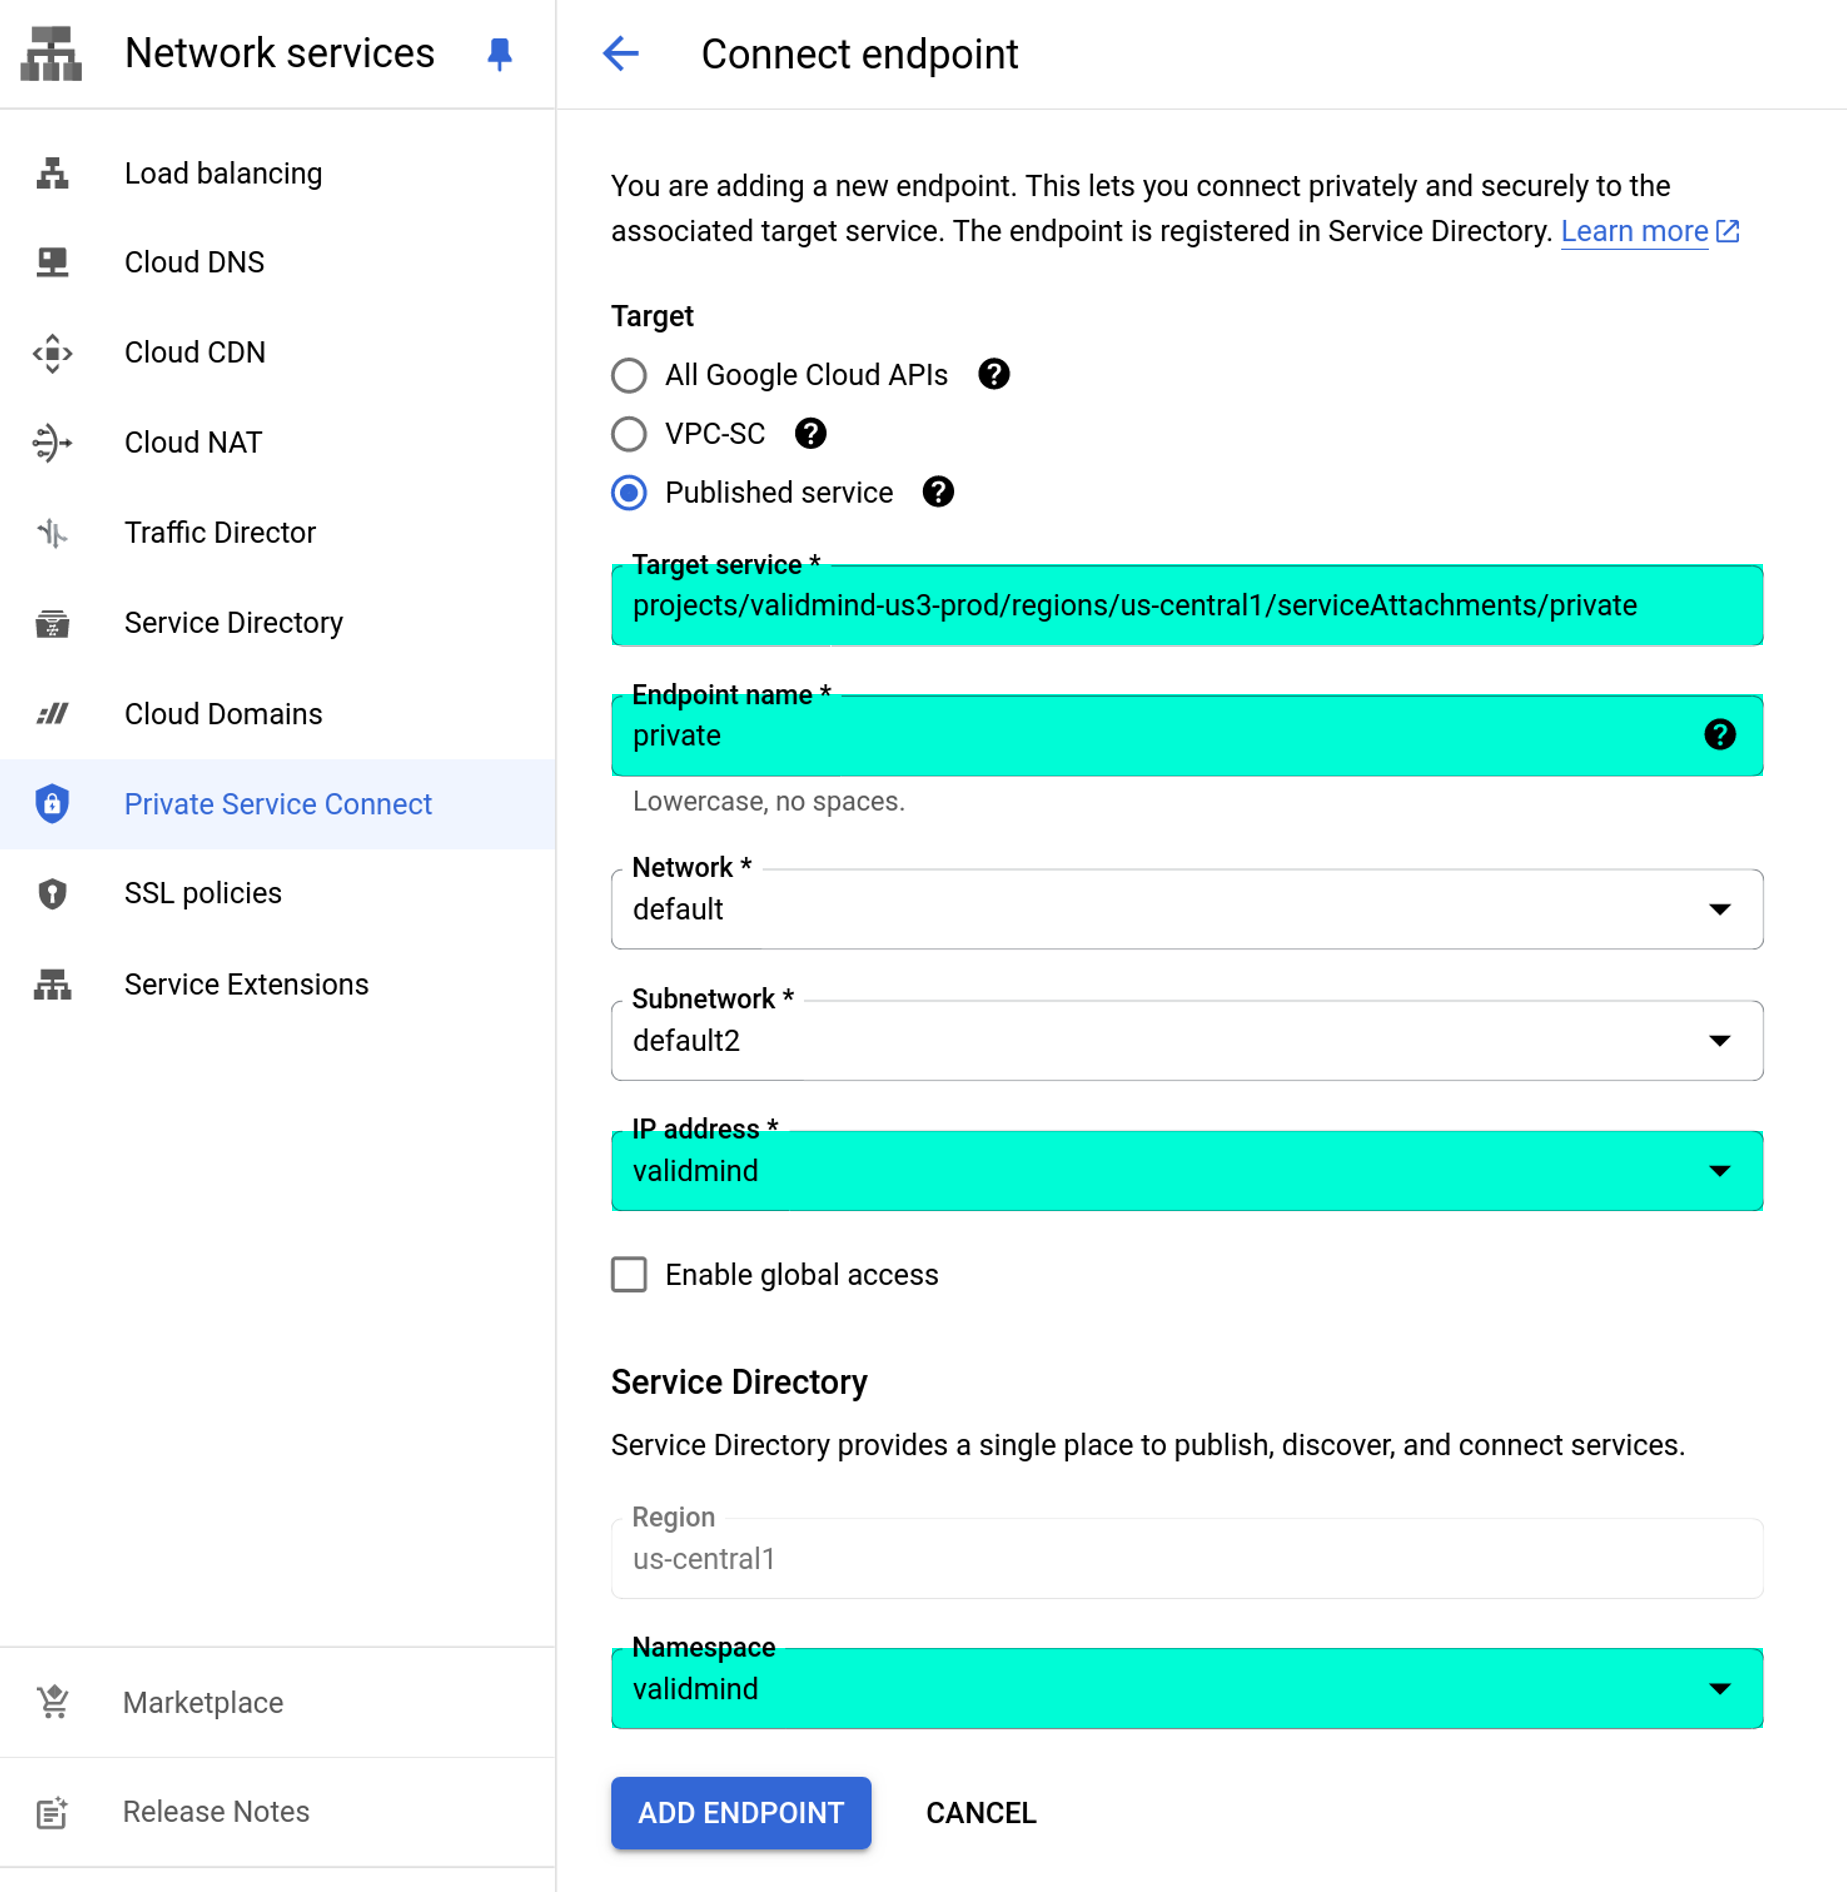
Create the endpoint:
Click Create Connection Endpoint.
Check Published service for the target.
For Endpoint name, enter
private.For Target service, enter:
projects/validmind-us3-prod/regions/us-central1/serviceAttachments/private.For IP address, enter
validmind.Enable Service Directory for this endpoint to provide DNS resolution and enable service discovery.
For Namespace, enter
validmind.Click Add Endpoint.
After the endpoint is active, test that the service is reachable through the private connection and that DNS requests resolve as expected.
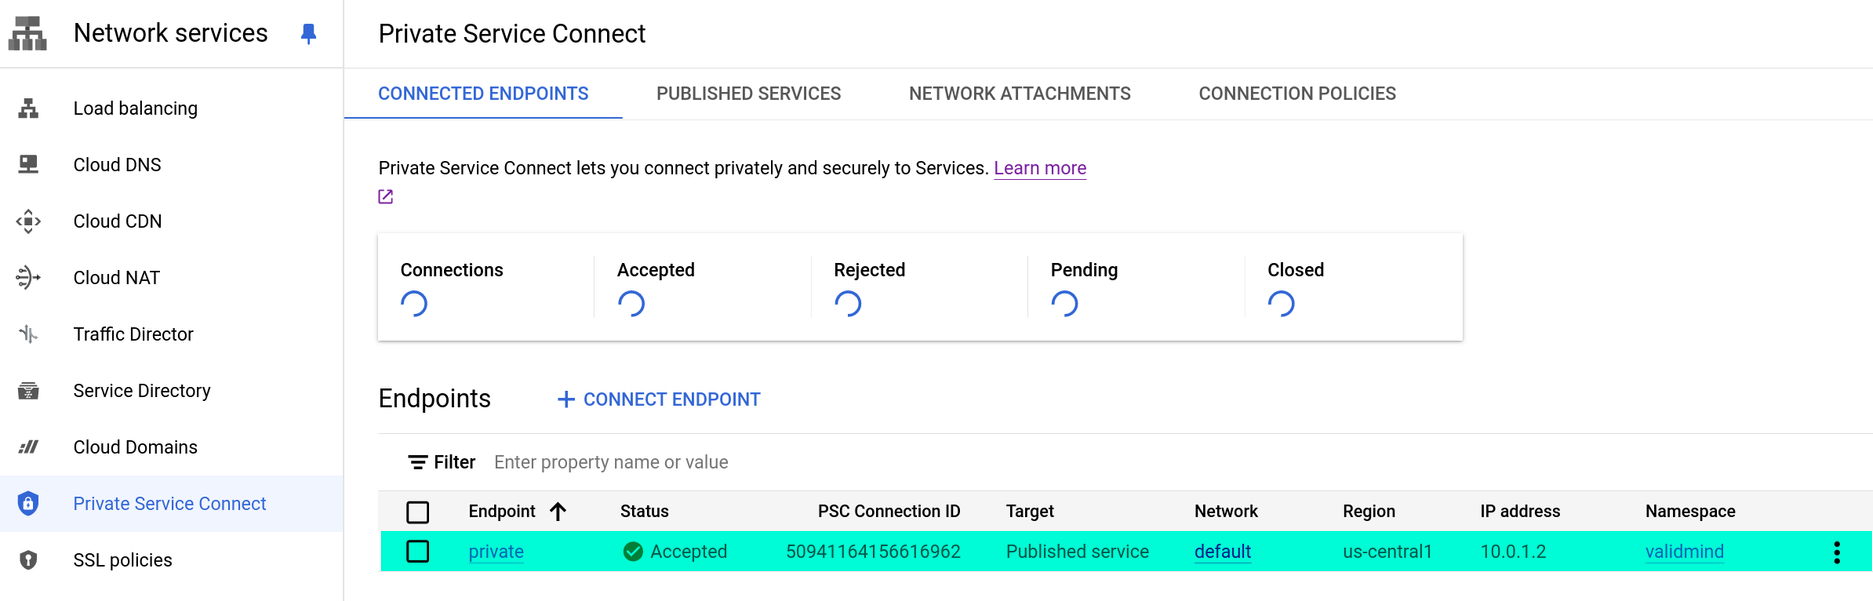
private endpoint in the Google Cloud ConsoleCreate an endpoint to connect to the ValidMind authentication service
Repeat the steps to create an endpoint to connect to ValidMind to add another endpoint for the ValidMind authentication service.
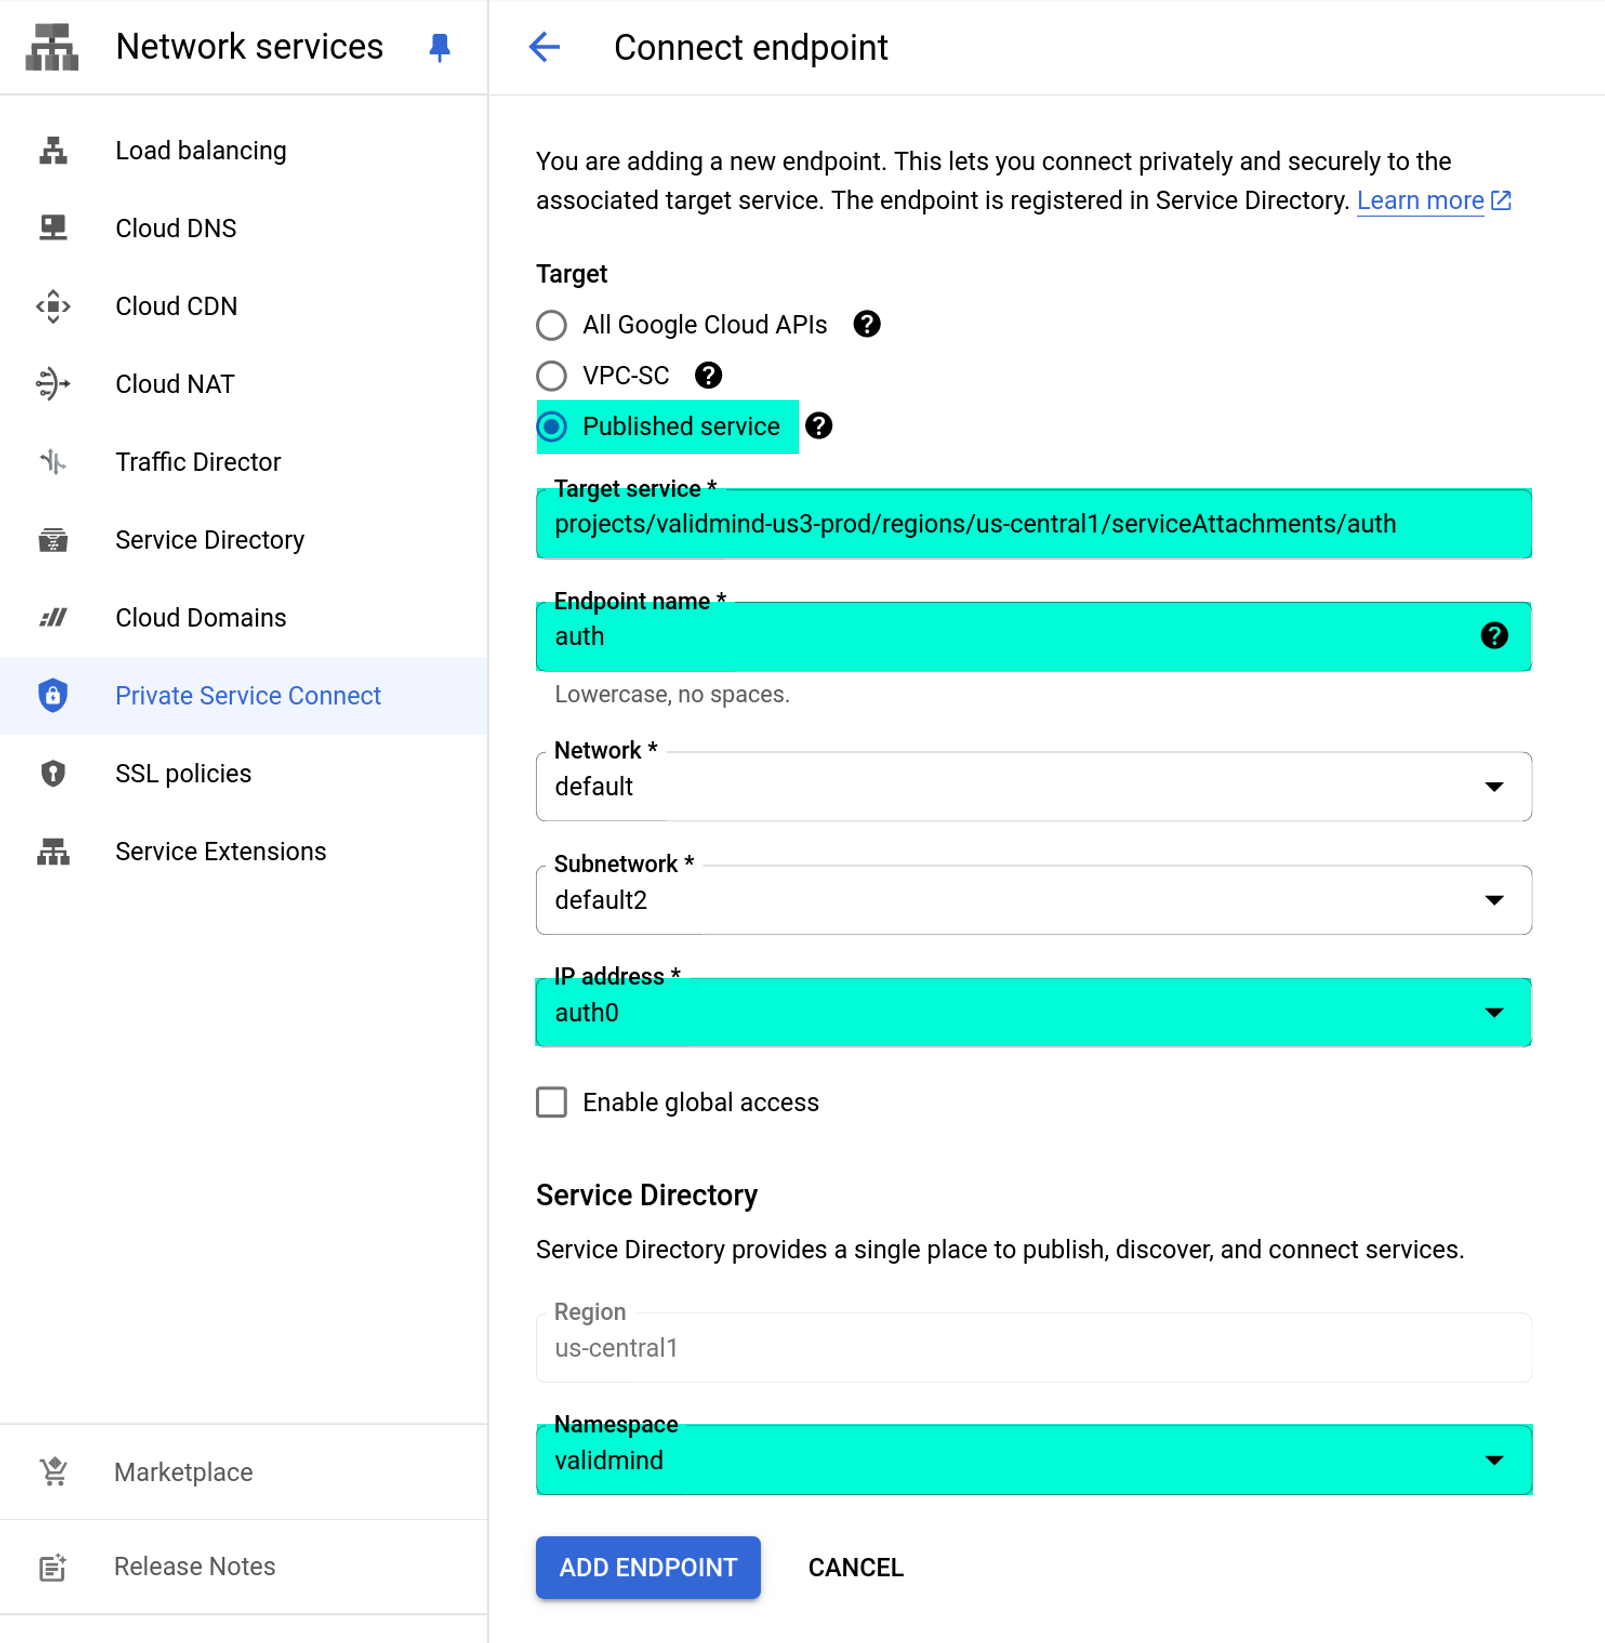
Steps
Check Published service for the target.
For Target service, enter:
projects/validmind-us3-prod/regions/us-central1/serviceAttachments/auth.For Endpoint name, enter
auth.Enable Service Directory for this endpoint
For Namespace, enter
validmind.
After the endpoint is active, test that the service is reachable through the private connection and that DNS requests resolve as expected.
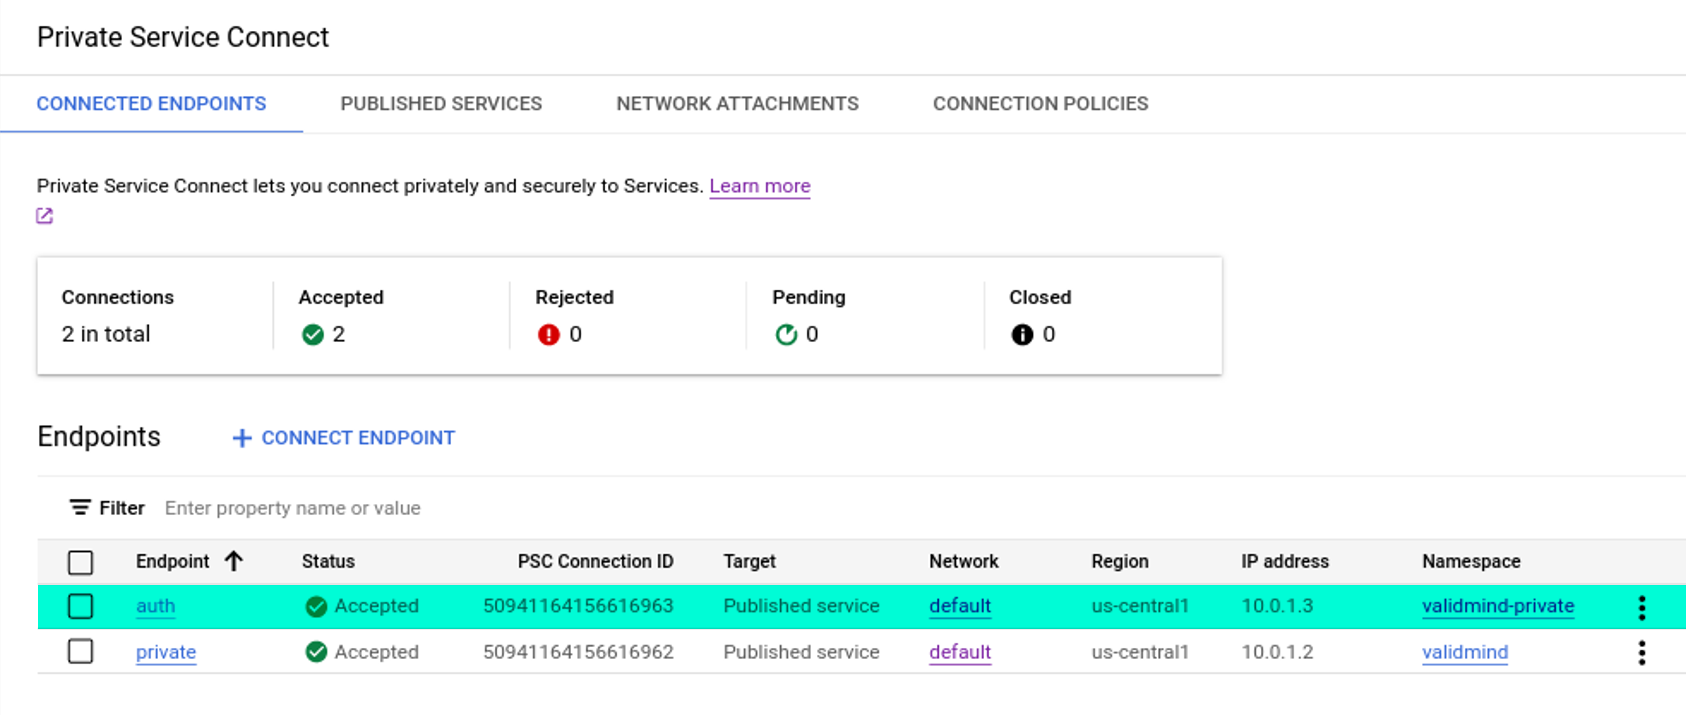
auth endpoint in the Google Cloud ConsoleTest connectivity
As a final step, test that everything everything is set up correctly and that you can reach the ValidMind services:
Under Network Services > Cloud DNS, verify that DNS and service discovery are functioning as expected.
Test your connection to the following hosts:
- ValidMind Platform UI: https://private.us3-prod.validmind.ai
- ValidMind authentication service: https://auth.private.validmind.ai